Walkthrough 12-4: Publish and listen for JMS messages
In this walkthrough, you send a JMS message for each new database record so it can be processed asynchronously. You will:
· Add and configure a JMS connector for ActiveMQ (that uses an in-memory broker).
· Send messages to a JMS queue.
· Listen for and process messages from a JMS queue.
Starting file
If you did not complete the previous walkthrough, you can get a starting file here. This file is also located in the solutions folder of the student files ZIP located in the Course Resources.
Add the JMS module to the project
1. Return to accounts.xml.
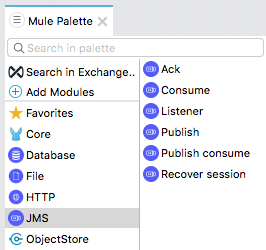
2. In the Mule Palette, select Add Modules.
3. Select the JMS connector in the right side of the Mule Palette and drag and drop it into the left side.
4. If you get a Select module version dialog box, select the latest version and click Add.
Configure the JMS connector
5. Return to the Global Elements view of global.xml.
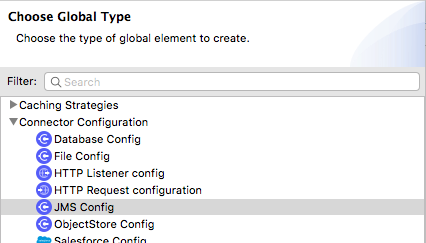
6. Click Create.
7. In the Choose Global Type dialog box, select Connector Configuration > JMS Config and click OK.
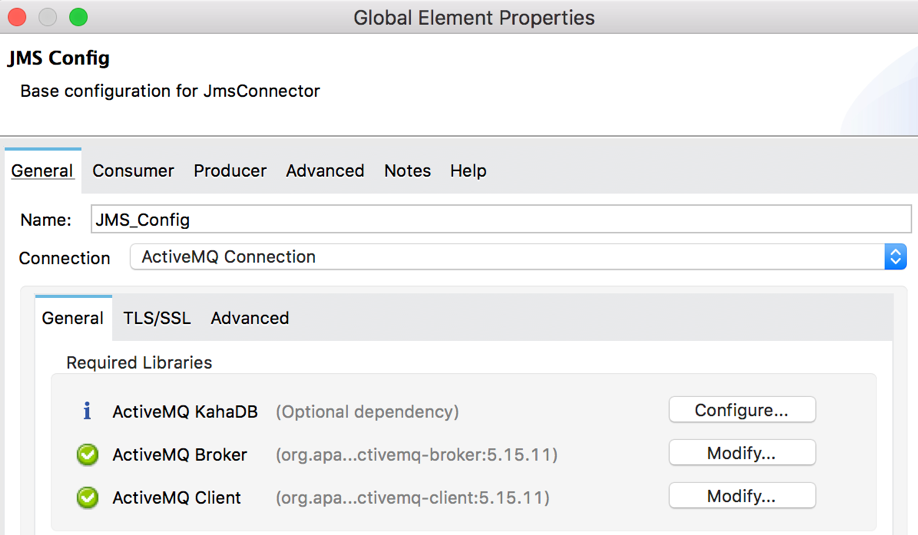
8. In the Global Element Properties dialog box, make sure the connection is set to ActiveMQ Connection.
9. Click the Configure > Add Maven dependency option for the ActiveMQ Broker.
10. In the Maven dependency dialog box, enter activemq-broker in the Search Maven Central field.
11. Select the org.apache.activemq:activemq-broker entry and select Finish.
Note: There are local versions of the drivers available in the student files.
12. Scroll down and locate the Connection Factory section.
13. For Factory configuration, select Edit inline; the Broker url should already be populated.

14. Click OK.
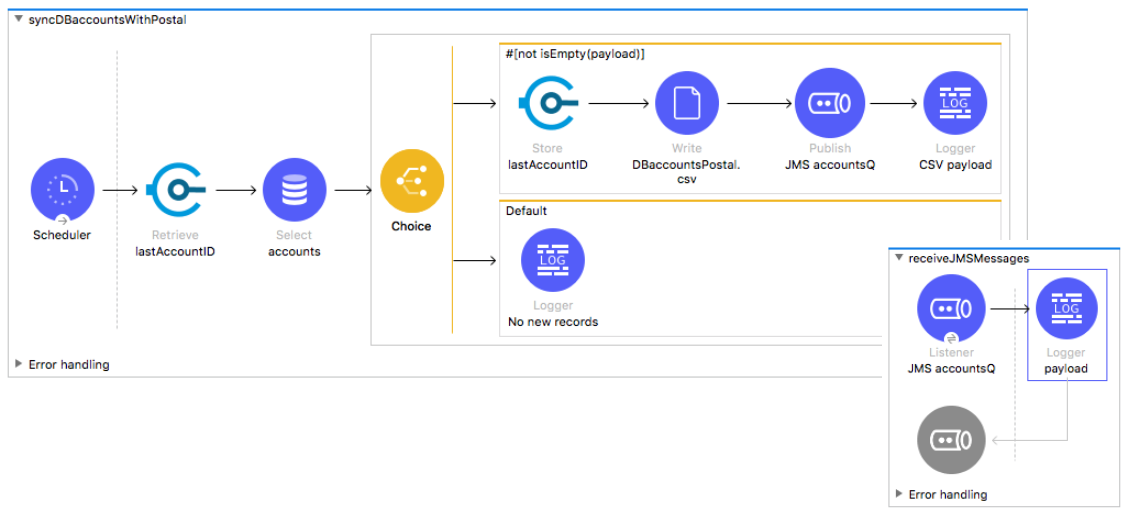
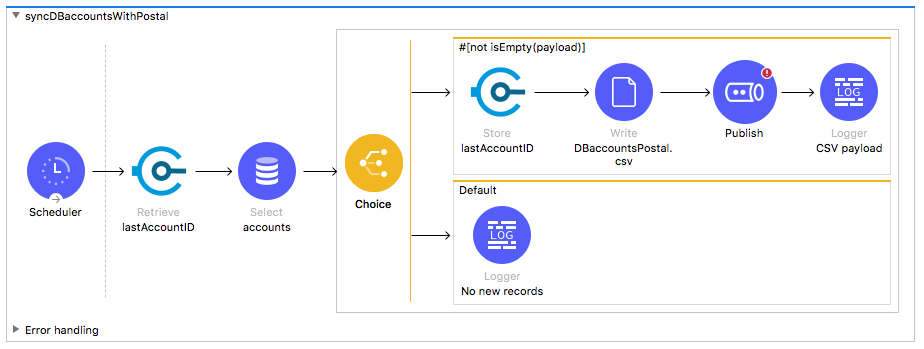
Use the JMS Publish operation to send a message to a JMS queue
15. Return to accounts.xml.
16. Drag out a JMS Publish operation from the Mule Palette and drop it after the Write operation in syncDBaccountsWithPostal.
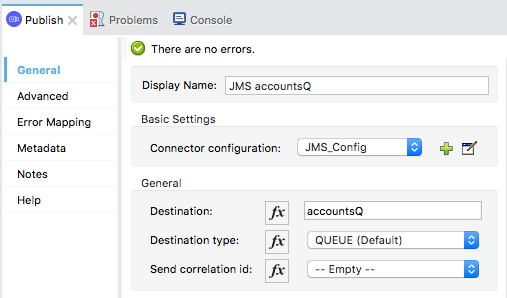
17. In the Publish properties view, set the following values:
· Display Name: JMS accountsQ
· Connector configuration: JMS_Config
· Destination: accountsQ
· Destination type: QUEUE
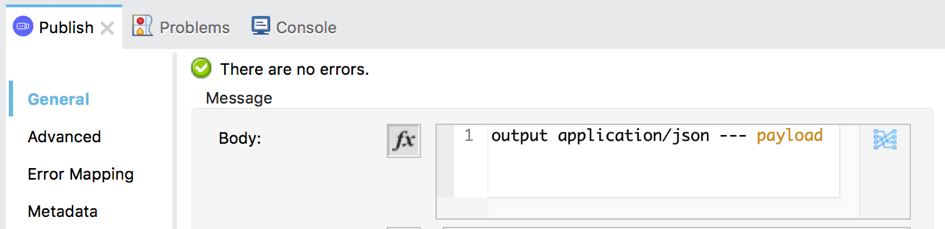
18. Modify the message body to be of type application/json.
output application/json --- payload
19. Scroll down and locate the User Properties field.
20. Use expression mode and set it equal to an object with a key called publisher and a value of training.
{"publisher":"training"}

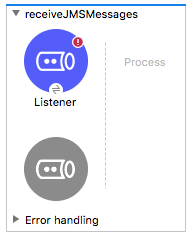
Create a flow to listen to a JMS topic
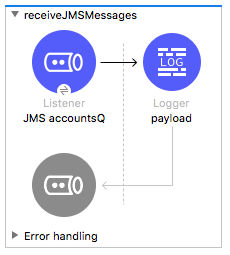
21. Drag out the JMS Listener operation from the Mule Palette and drop it in the canvas to create a new flow.
22. Give the flow a new name of receiveJMSMessages.
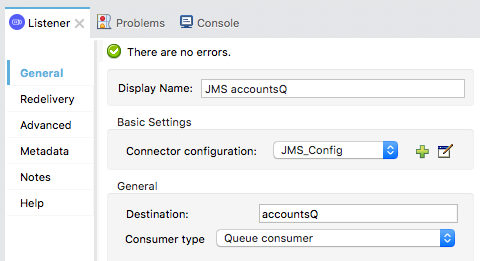
23. In the Listener properties view, set the following values:
· Display Name: JMS accountsQ
· Connector configuration: JMS_Config
· Destination: accountsQ
· Consumer type: Queue consumer
24. Add a Logger to the flow.
25. Set its display name to payload and its message to #[payload].
Clear application data and debug the application
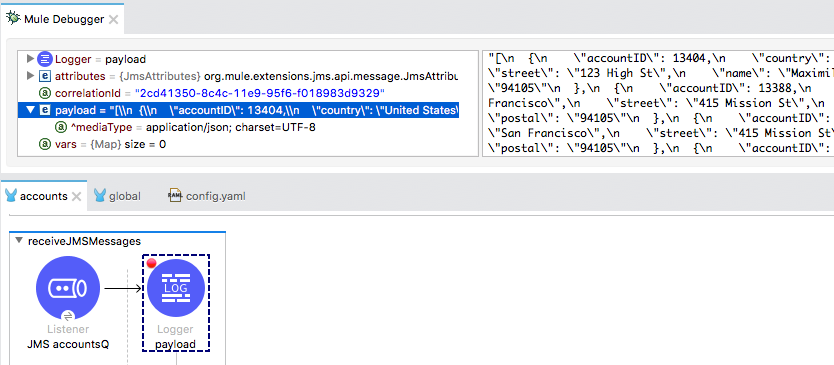
26. Add a breakpoint to the Logger in receiveJMSmessages.
27. Save the files and debug the project.
28. In the Clear Application Data dialog box, click Yes.
29. Wait until the project deploys; application execution should stop in receiveJMSMessages.
30. In the Mule Debugger view, look at the value of the payload.
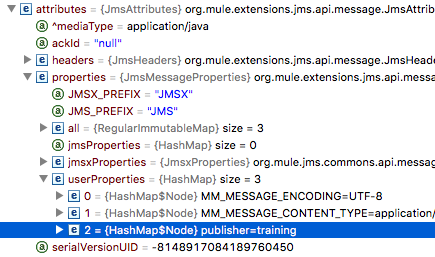
31. Expand the Attributes and locate the publisher property in the userProperties.
32. Step through the rest of the application; you should see the JSON message in the console.
Note: If you want to test further, return to the account data in the web browser at http://mu.mulesoft-training.com/accounts/show and add a new record with the same postal code. Do not use quotes, especially in the name field.
33. Stop the project and switch perspectives.